The LEMP Stack is a suite of software that makes it possible to serve dynamic web pages and applications hosted on your server. LEMP is an acronym that describes Linux, Nginx (sounding as Engine X), MySQL, PHP/Python/Perl, a combination that makes it easy to store data, and serve dynamically processed data on your server.
In this guide, we’ll install the LEMP Stack on a CentOS 8 server. The stack requires a fresh server instance and a sudo user account to facilitate the installation of all software packages.
Prerequistes
Before you follow this guide, please make sure you have.
- A CentOS 8 Server
- A non-root user account with sudo privileges (root access rights)
- SSH access to the server
Step 1: Install Nginx
In order for the server to display web pages to visitors, we need to install Nginx which can be configured to serve static and dynamic websites. By default, Nginx is available in the CentOS 8 sources.
Install Nginx.
$ sudo dnf install nginx
Once installed, Allow http and https traffic to the server for Nginx to operate well.
$ sudo firewall-cmd --permanent --zone=public --add-service=http$ sudo firewall-cmd --permanent --zone=public --add-service=https
Restart the Firewall for rules to take effect.$ sudo systemctl reload firewalld
Now, start the Nginx web server and enable it to run at system boot.
$ systemctl start nginx
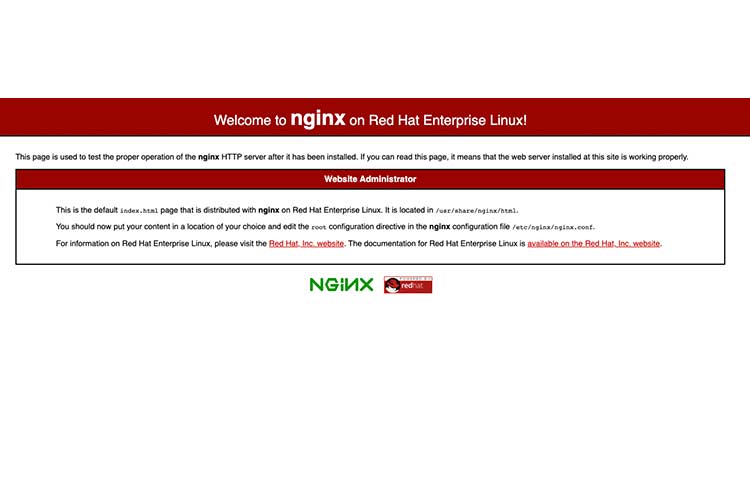
In a web browser, visit your public server IP address or domain name to confirm your nginx installation. Your output should be similar to the one below.
Step 2: Install MySQL
With a web server installed on your server, you need a database server to be able to store data for your websites. By default, MySQL 8.0 is available on the CentOS 8 repository packages list and can be identified by mysql_server.
$ sudo dnf install mysql-server
With installation done, start the MySQL daemon and enable it to run at system startup.
$ sudo systemctl start mysqld
Now, secure your database server by setting a root password
$ sudo mysql_secure_installation
Next, test the Installation by creating a sample database and user for your server.
Login to MySQL.
$ mysql -u root -p
Create a new database.
mysql > CREATE DATABASE sampledb;
Create a new database user
mysql > CREATE USER ‘user'@'localhost' IDENTIFIED BY 'YOUR_PASSWORD';
Exit the console
mysql > EXIT
You can now login to MySQL with the created non-root user to create databases.
$ mysql -u user -p
Step 3: Install PHP
With a web and database server installed, you need a dynamic data processor to serve web content and PHP is the best component to install. Also the php-mysqlnd allows PHP to communicate with MySQL databases and php-fpm makes connections with Nginx possible.
Install PHP and necessary modules
$ sudo dnf install php php-mysqlnd php-fpm
Now, modify the PHP-FPM main configuration file to listen for the user nginx.
In your favorite editor, open and edit `/etc/php-fpm.d/www.conf`.
$ sudo nano /etc/php-fpm.d/www.conf
Locate the user and group entries.
user = apache ; RPM: Keep a group allowed to write in log dir. group = apacheChange them to `nginx`.
user = nginx; RPM: Keep a group allowed to write in log dir.group = nginxSave and close the file.
Restart PHP-FPM and Nginx.
$ sudo systemctl restart php-fpm
$ sudo systemctl restart nginx
Step 4: Test PHP with Nginx
On CentOS 8, Nginx stores web server files at `/usr/share/nginx/html`, let’s create a sample `info.php` file at the directory.
$ sudo nano /usr/share/nginx/html/info.php
Enter the following code
<?

phpinfo();

?>
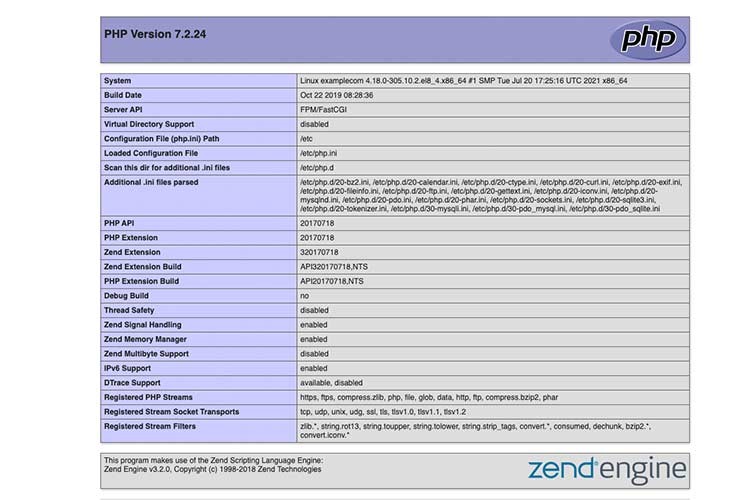
Now, In a web browser, load your server IP or domain name and add /info.php to load the file. You output should be similar to the one below.